Quick Answer: Making AI videos consistent across different tools requires a documented style guide, reusable prompt templates, and a standardized post-processing workflow. By locking down your visual identity before you start generating, you can move between tools like Pika, Runway, or DomoAI without your videos looking like they were made by five different people.
Key Takeaways
- Build a master style guide before touching any AI video tool
- Use identical seed prompts and save them in a shared template library
- Standardize resolution, frame rate, and color grading across every tool
- Use a consistent character reference sheet or LoRA model when the tool supports it
- Post-processing in a single editor (like DaVinci Resolve or Premiere) is your consistency safety net
- Match audio style, pacing, and transitions across all generated clips
- Test each new tool against your style guide before committing to a full project
- Document what works: keep a “prompt log” with results for each tool
Why AI Video Consistency Is Harder Than It Looks
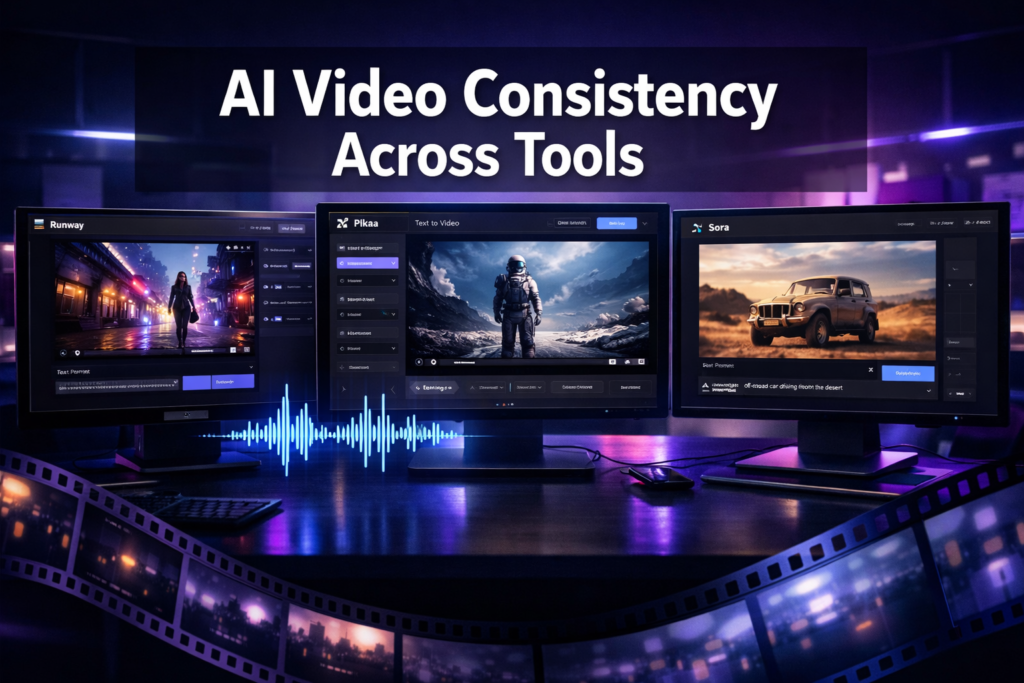
Most creators assume the hard part of AI video is generating good footage. The real challenge is getting footage from three different tools to look like it came from one source.
Each AI video platform has its own model biases. Runway tends toward cinematic, filmic outputs. Pika leans more stylized. Kling handles motion differently than Sora. Even with identical text prompts, these tools produce noticeably different results in lighting, color temperature, and motion blur.
The good news: consistency is a workflow problem, not a technology problem. You can solve it with the right system.
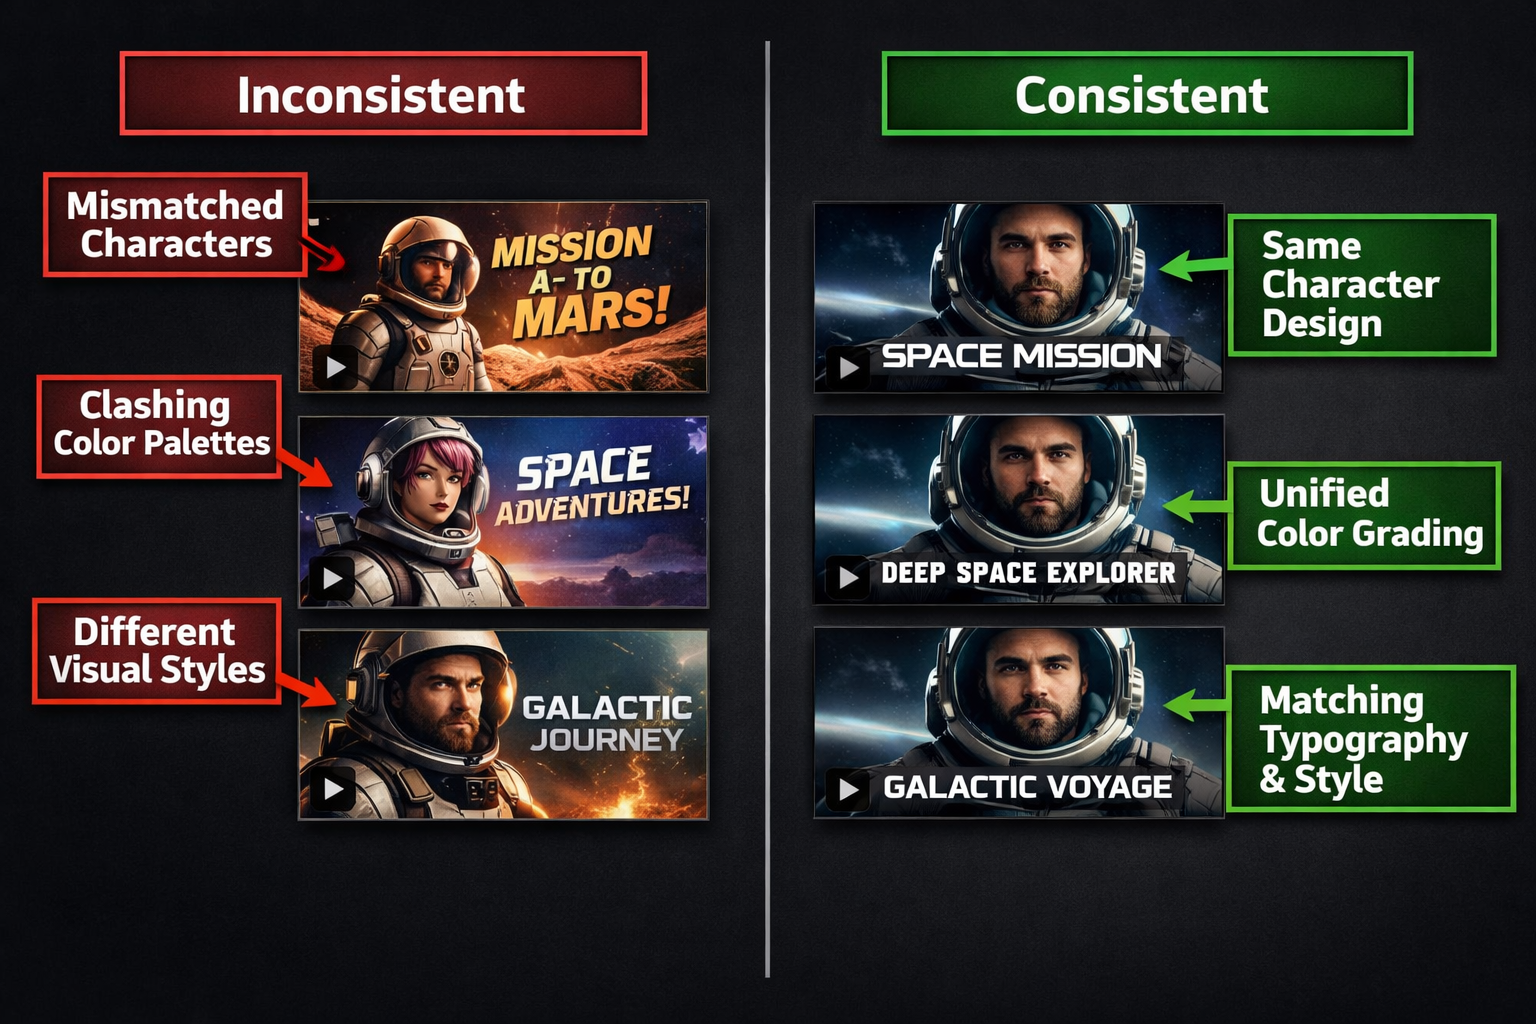
What Is a Video Style Guide and Why Do You Need One?
A video style guide is a reference document that defines every visual and audio decision for your project before a single frame is generated. Think of it as a brand kit, but for AI video production.
Your style guide should include:
- Color palette: Hex codes or reference images for dominant and accent colors
- Lighting style: Golden hour, studio flat, high contrast noir, etc.
- Camera language: Shot types (close-up, wide, drone), movement style (static, handheld, smooth glide)
- Character references: Consistent descriptions or image references for recurring people or avatars
- Mood keywords: A short list of adjectives every prompt should include (e.g., “cinematic, warm, 4K, shallow depth of field”)
- Audio tone: Upbeat, ambient, dramatic, minimal
Without this document, every tool you use will pull your video in a different direction.
How to Make AI Videos Consistent Across Different Tools Using Prompt Templates
The single most effective technique for cross-tool consistency is a standardized prompt template. Every tool you use should receive the same core descriptors, with only tool-specific syntax adjustments.
Here’s a practical template structure:
<code>[Subject] + [Action] + [Setting] + [Lighting] + [Camera] + [Style keywords] + [Technical specs]
</code>
Example prompt:
“A young woman in a red jacket walks through a rain-soaked Tokyo street at night, neon reflections on wet pavement, slow tracking shot, cinematic, film grain, 4K, shallow depth of field”
This same prompt, adapted to each platform’s syntax, produces far more cohesive results than writing fresh prompts for every tool.
Pro tip: Keep a prompt log spreadsheet. Record the exact prompt, the tool used, the settings, and a screenshot of the result. Over time, this becomes your most valuable asset for maintaining consistency.
For creators exploring different platforms, reading tool-specific reviews helps you understand each platform’s default biases. For example, the Pika AI review and the DomoAI review both highlight how differently these tools interpret the same visual instructions.
How to Standardize Technical Settings Across Tools
Matching technical specifications is non-negotiable for consistency. Even if your visual style is perfect, mismatched frame rates or resolutions will make your final edit feel disjointed.
| Setting | Recommended Standard | Why It Matters |
|---|---|---|
| Resolution | 1080p or 4K (pick one) | Prevents scaling artifacts in editing |
| Frame rate | 24fps (cinematic) or 30fps (web) | Mismatched FPS causes motion inconsistency |
| Aspect ratio | 16:9 (landscape) or 9:16 (vertical) | Locks your format for platform delivery |
| Color space | Rec. 709 for web, DCI-P3 for cinema | Ensures consistent color rendering |
| Export format | MP4 (H.264 or H.265) | Universal compatibility across editors |
Set these as defaults in every tool before generating. Many platforms let you save project presets. Use them.
What Role Does Post-Processing Play in Cross-Tool Consistency?
Post-processing is your final consistency layer, and it’s where most of the real work happens. Even well-matched prompts will produce slight variations in color grading, brightness, and saturation across different AI tools.
Here’s a practical post-processing workflow:
- Import all clips into one editor (DaVinci Resolve, Premiere Pro, or Final Cut)
- Apply a single LUT (Look-Up Table) to every clip to unify color grading
- Normalize audio levels across all clips to a consistent LUFS target
- Match cut timing so transitions feel intentional, not accidental
- Add consistent lower thirds, titles, or motion graphics using a single template
Tools like Fluent Frame AI and Frameloop AI include built-in post-processing features that can help apply consistent styling without a separate editing step.
How to Make AI Videos Consistent Across Different Tools When Using AI Avatars
When your video features a recurring AI avatar or character, consistency requires locking down the character reference before generating anything. This is the most technically demanding part of cross-tool consistency.
Different tools handle character consistency in different ways:
- LoRA models (used in Stable Diffusion-based tools): Train a LoRA on your character and use it across supported platforms
- Reference image inputs: Tools like Kling and Runway allow you to upload a reference image to anchor character appearance
- Detailed text descriptions: When image references aren’t supported, use a fixed character description block in every prompt (age, hair color, clothing, skin tone, facial features)
For AI lip-sync and talking head videos, consistency gets even more specific. The Diff2Lip review covers how lip-sync tools handle character consistency, and the Float by DeepBrain AI review shows how avatar-based tools approach this differently.
Common Mistakes That Break Cross-Tool Consistency
Most consistency failures come from a small set of predictable errors:
- Writing fresh prompts for each tool instead of adapting a master template
- Ignoring tool defaults (some tools add their own style modifiers automatically)
- Skipping the style guide and relying on memory
- Mixing frame rates in the same project
- Using different voice actors or TTS engines for narration across clips
- Not testing a new tool against existing footage before committing
One edge case worth knowing: some AI video tools apply automatic color grading that can’t be turned off. If you’re using a tool like Vheer alongside a more cinematic platform, you may need to aggressively color-correct in post to bridge the gap.
Which Tools Work Best Together for Consistent AI Video Production?
Choose tools that share similar model architectures or allow reference image inputs, because these combinations produce the most cohesive results with the least post-processing effort.
Some practical pairings that work well in 2026:
- Runway + Kling: Both support reference images and produce cinematic outputs
- Pika + Sora: Similar motion physics, easier to match in post
- DomoAI + Stable Diffusion tools: Shared visual aesthetic when using consistent LoRAs
For marketing video workflows, Ozor AI and Ngram AI both offer structured video creation pipelines that reduce the need to jump between multiple tools entirely.
Choose X if… You’re building a faceless content channel: use a single tool for 80% of your footage and reserve secondary tools only for specific shots (drone, macro, etc.) that your primary tool handles poorly.
FAQ
Q: Can I use the same prompt word-for-word in every AI video tool?
A: Not exactly. Each tool has its own syntax preferences and interprets keywords differently. Start with a master prompt, then adapt the phrasing for each platform while keeping the core descriptors identical.
Q: How do I keep character faces consistent across AI video tools?
A: Use a reference image input where the tool supports it. For tools that don’t, write a detailed, fixed character description block and include it in every prompt without variation.
Q: What’s the fastest way to unify color grading across clips from different tools?
A: Apply a single LUT to all clips in your video editor. Free LUT packs are widely available, or you can create a custom one from a reference frame you like.
Q: Do I need to use the same AI video tool for an entire project?
A: No, but you should minimize tool-switching. Use one primary tool for the majority of your footage and treat secondary tools as supplements for specific shot types.
Q: How important is audio consistency compared to visual consistency?
A: Very important. Inconsistent audio (different TTS voices, mismatched music styles, varying volume levels) is often more jarring to viewers than visual differences. Standardize your audio workflow with the same rigor as your visual workflow.
Q: What frame rate should I use for AI videos published online?
A: 24fps for a cinematic feel, 30fps for a natural web video look. Pick one and use it across every tool and every clip in the project.
Q: Can a style guide work for a team of creators using different tools?
A: Yes, and it works even better in a team context. A shared style guide prevents individual team members from making independent decisions that break the overall look.
Q: How often should I update my style guide?
A: Review it at the start of each new project or when you add a new tool to your workflow. Don’t change it mid-project.
Conclusion: Build the System Once, Use It Every Time
Achieving consistency across AI video tools isn’t about finding one perfect platform. It’s about building a repeatable system: a style guide, a prompt template library, standardized technical settings, and a unified post-processing step.
Your immediate action steps:
- Write your style guide today, even if it’s just one page
- Build a master prompt template and save it somewhere accessible
- Set resolution, frame rate, and color space as defaults in every tool you use
- Pick one video editor for all post-processing and create a project template
- Test any new tool against your existing footage before using it in a live project
The creators who produce the most professional-looking AI video content in 2026 aren’t necessarily using the best tools. They’re using any set of tools with a consistent, documented workflow. That’s a skill that compounds over time.
For a deeper look at specific tools and how they handle visual consistency, browse the full AI video and media tools category for hands-on reviews and comparisons.
References
- Runway ML Documentation, 2024, https://runwayml.com/docs
- Pika Labs Product Updates, 2024, https://pika.art
- DaVinci Resolve Color Management Guide, Blackmagic Design, 2023, https://www.blackmagicdesign.com/products/davinciresolve